Creating web-optimised images for your website is important for search engine optimization (SEO), user experience and website performance.
There are two main things that you are likely to need to do when adding images to your website:
- Optimise an image while keeping the original proportions (Not changing the shape of the image, but resizing for performance)
- Create an image to specific dimensions – to maintain an element of your website design; then optimising this for performance
We are always on hand to optimise and upload images for our clients, but sometimes it is good to know how to do things yourself.
We want to empower you to be able to manage your own website images, by showing you how to use Canva.com.
IMPORTANT NOTE: The free version of Canva has its limitations – you cannot resize images on the free plan. To do both of the tasks listed above without a Canva Pro subscription, you will need to use the method for Creating an image to specific dimensions.
For effective SEO, every time you add an image to your website, you need to do these four things:
- Resize it to an appropriate width (never wider than 2000 pixels) Often images don’t need to be wider than 1200 pixels if they are not being used full screen width – for a blog post, product or portfolio entry for example.
- Reduce the image file quality to around 70%
- Name the image for SEO. Use your business name, plus some words that either describe the contents of the image, or some important, relevant keywords form your site, separating the words with hyphens and using all lower-case lettering
IE: product-name-category-business-name.jpg - Add ALT text. Once you have uploaded the image, add ALT text to the image in the media library. You do this by clicking on the image, then filling in the Alternative Text field.
Let’s go!
1. Resizing an Image
IMPORTANT NOTE: This feature is only available to Canva Pro, Canva for Enterprise, Canva for Education, and Canva for Nonprofits users. If you do not have a canva pro account – try using Pixlr for this feature.
From the home page, select UPLOAD
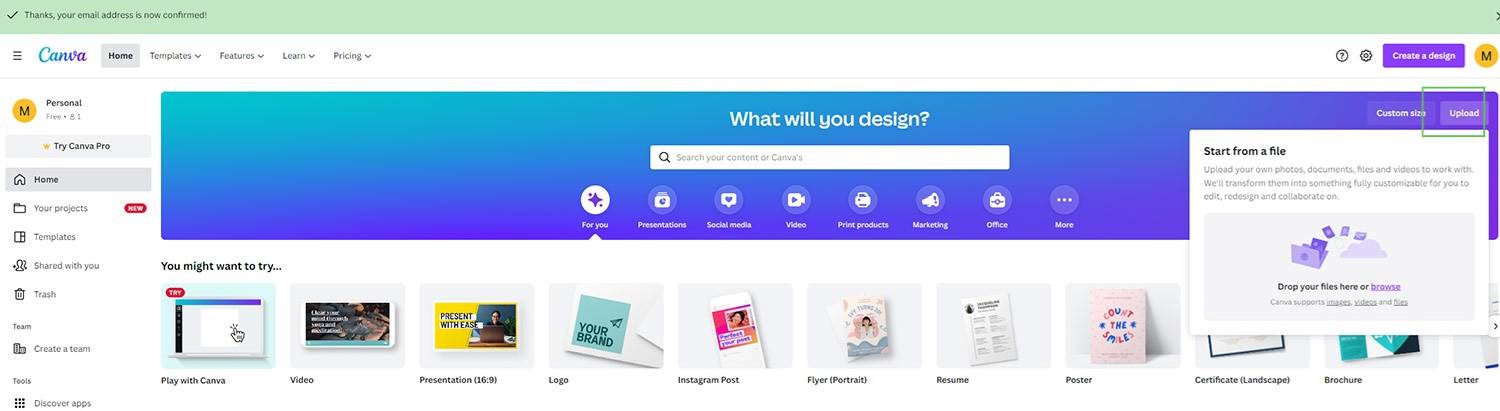
This will pop up with a window to upload your image, or drop your image.
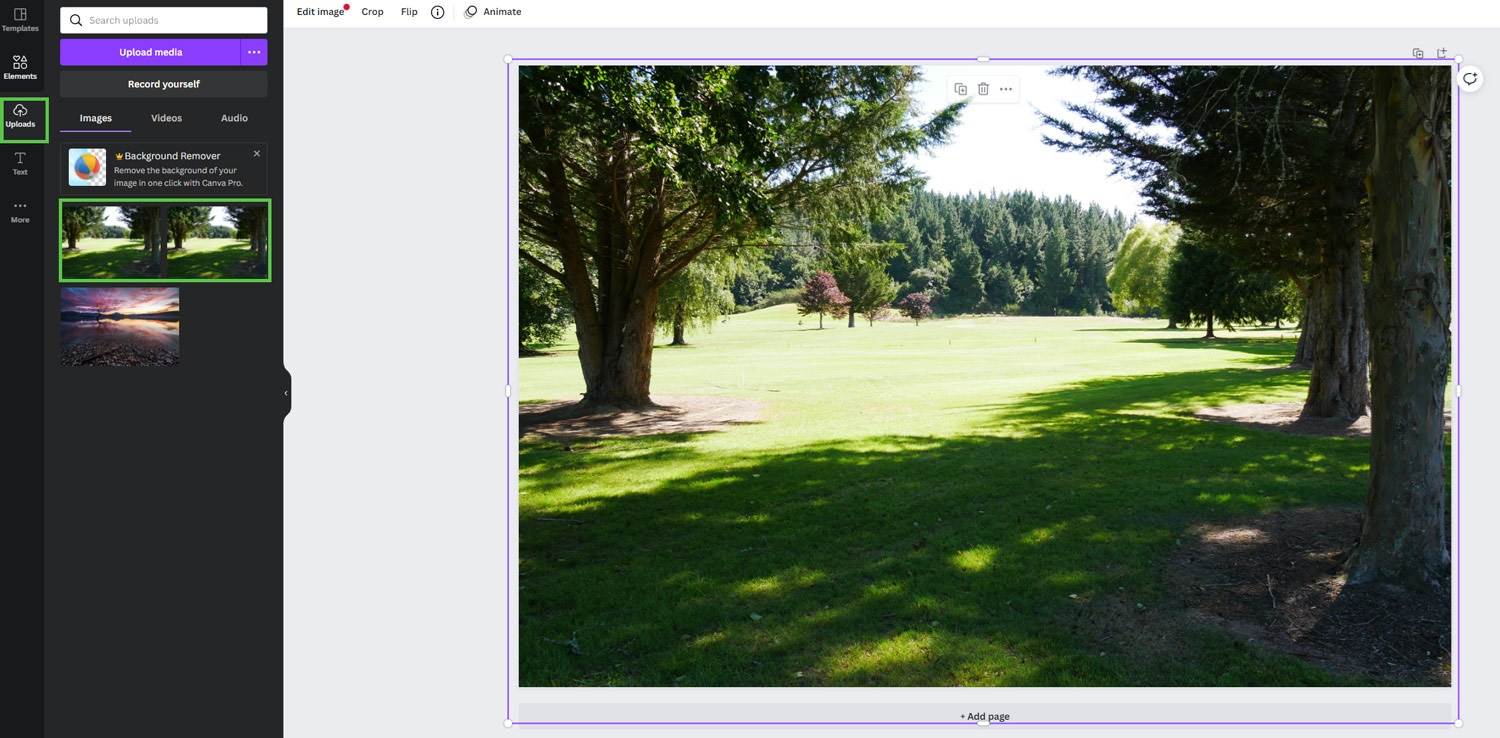
Select an image and you will see the following window. Press EDIT PHOTO

On the menu bar above the editor, click Resize.
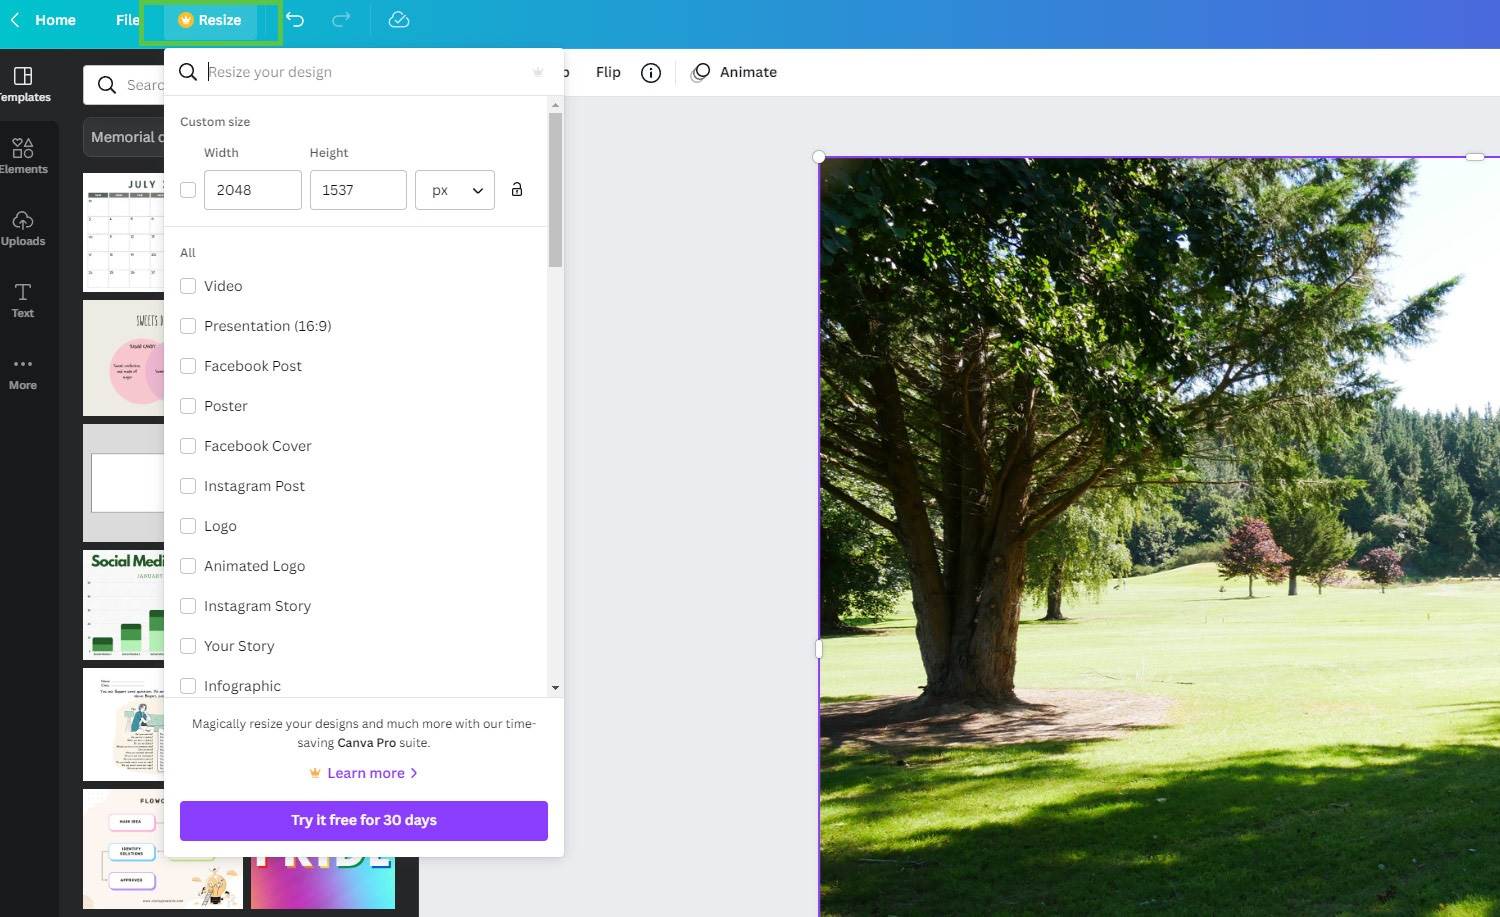
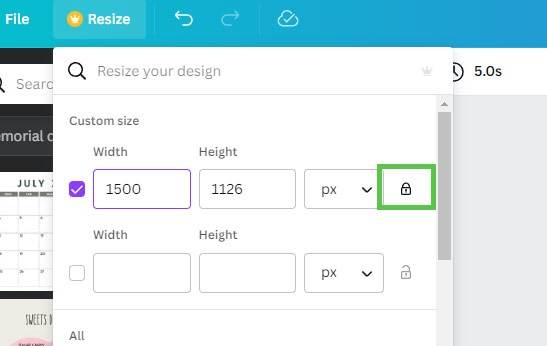
Make sure you click the lock icon to constrain the proportions (this ensures your image doesn’t become distorted)
Enter the new width that you want the image to be (you will see the height adjust accordingly) and then press Resize.
Navigate to the SHARE button at the top right of your screen, and go down to DOWNLOAD
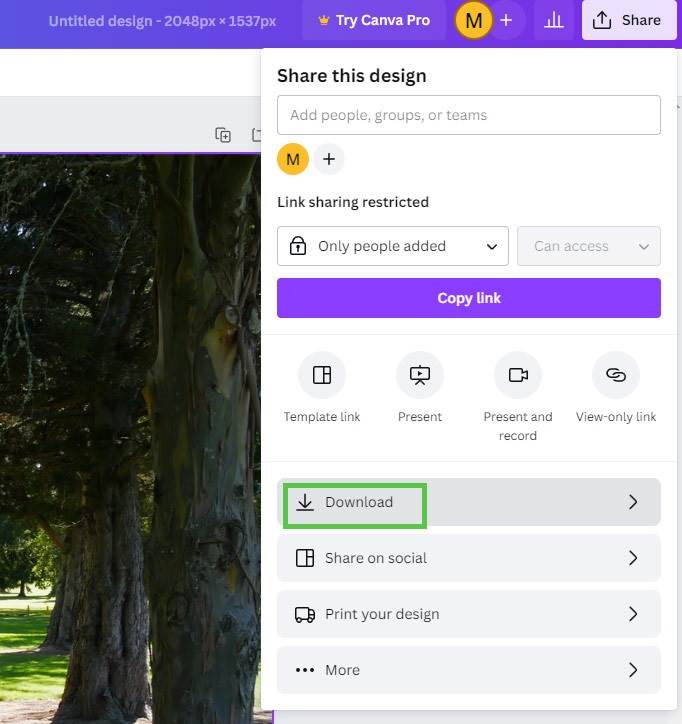
It will suggest a PNG file, but change this to JPG. (The only time you should use PNG files on your website, is if you have an object with a transparent background. Otherwise the JPG file is a much smaller file size, which is better for your SEO).
Slide the quality to 70%, and press DOWNLOAD.
This will now save to your downloads folder. If you have named your design (You set this in the top purple bar in Canva), then the image will be named according to this. If you haven’t, it will be called Untitled Design.jpg.
IMPORTANT: Before you upload to your website be sure to rename the image meaningfully – using keywords for SEO. Some examples are:
- product-name-category-business-name.jpg
- keyword-keyword-business-name.jpg
- words-describing-what-the-image-is-about.jpg
2. Creating an Image to a Specific Dimension (Width x Height)
There will be many images on your website which have been made a specific dimension so that they look uniform. When replacing existing images, it is recommended that you open the image up in the Media Library, and check the dimensions. Then create a new canvas at that size to put your image in.
IMPORTANT: New images should be created to these exact dimensions to maintain the current look of your website. At the very least they should be the same width – but if there are a row of images that are the same dimensions, changing the height of one, will affect the look.
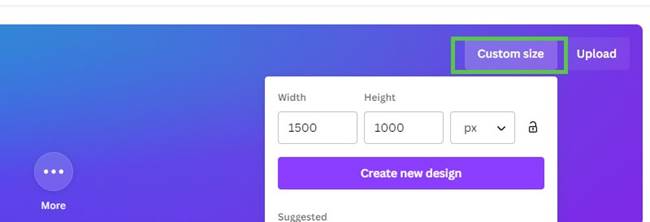
Select CUSTOM SIZE.
Choose your dimensions and enter them into the box. I am creating a landscape image 1500 pixels wide by 1000 pixels high. Press CREATE NEW DESIGN button
You will then have a blank canvas to work with.
Go to the left hand menu, and navigate to UPLOADS. From there you can select an image from your library, or upload a new image. When you click on the image, it will populate your canvas. Use the toggles on the corners of the image to drag it bigger until it completely fills the canvas.
If your source image has different dimensions to the canvas (IE: if your image is landscape, and the canvas is square) some of the image will be cropped off.
Once you are happy with the layout of your image, navigate to the SHARE button at the top right of your screen, and go down to DOWNLOAD.
It will suggest a PNG file, but change this to JPG. (The only time you should use PNG files on your website, is if you have an object with a transparent background. Otherwise the JPG file is a much smaller file size, which is better for your SEO).
If you are using the Pro version, slide the quality to 70%. If you are using the free version, you are restricted to having the image set to 80%. (For full image optimisation options, you can use Pixlr instead.) and press DOWNLOAD.
This will now save to your downloads folder. If you have named your design (available in the top purple bar in Canva), then the image will be named according to this. If you haven’t, it will be called Untitled Design.jpg.
IMPORTANT: Before you upload to your website be sure to rename the image meaningfully – using keywords for SEO. Some examples are:
- product-name-category-business-name.jpg
- keyword-keyword-business-name.jpg
- words-describing-what-the-image-is-about.jpg
An important note is that you must ensure that any image you use on your website you have the legal right to do so. Images should be your original photos, purchased stock photos or images that are free to use online (you can check out a list of Free Stock Photo Websites we have compiled here). It is not OK to take an image from Google, as copyright most likely will apply.
Happy photo editing!